

 As a child, I loved pretend play. I loved imagining myself traveling to fantastical worlds that existed in my imagination or in the books I read and movies I saw. There was nothing more magical than having a large cardboard box and turning it into my retreat, where I could conjure up more fantasies. I decided I would share my love of cardboard houses with my son, but adding my own twist to it of course.
Inspiration:
I started by looking up real houses I like and I decided I wanted the house to have a Victorian feel and I wanted it to be a haunted house, of course. After that, I just bought several boxes in different sizes and experimented with different heights and different ways of composing the roofs. I didn’t follow any tutorials, I just worked with the boxes and folded them in different ways to get the look I wanted.
Materials Used for Construction:
I purchased Duck Heavy Duty boxes, because I wanted cardboard that would be thick and would keep the house stable for a long time. Especially for a rambunctious one year old. Originally, I was only going to make the house with two main boxes connected to each other, but then I decided that would be much too small a play area, so in the end I bought 4 (18 in x 18 in x 24 in) boxes, 4 (16 in x 16 in x 15 in) boxes, and 2 (12 in x 12 in x 10.5 in) boxes.
I also used Makedo Construction Tools, Duct tape and natural bamboo stakes.
The Process:
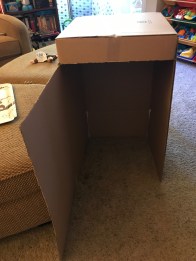
I first began by forming the bigger boxes. I only taped one of the top sides down and left the other side open (to give the house more height). As you can see in the picture (the top part of the box is taped down and the bottom part is left open and taped on the edges where the box is cut so that it can easily fold. I cut a big hole in the center part to allow access to the other side of the house.
At this point, I also decided where I wanted windows and doors and what they would look like. I drew the window and door shapes on the boxes and then used an old knife and cut out the shapes (I found it to be much easier than using scissors and my x-acto knife was nowhere to be found). For the doors and windows that open and close, I left a side uncut to keep the piece of cardboard attached to the box.
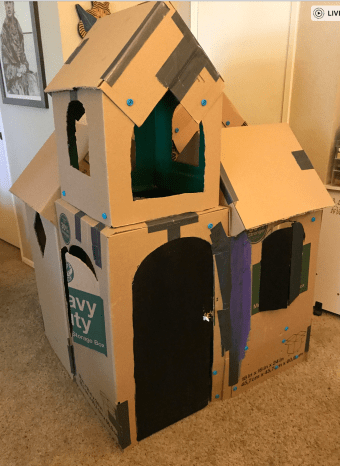
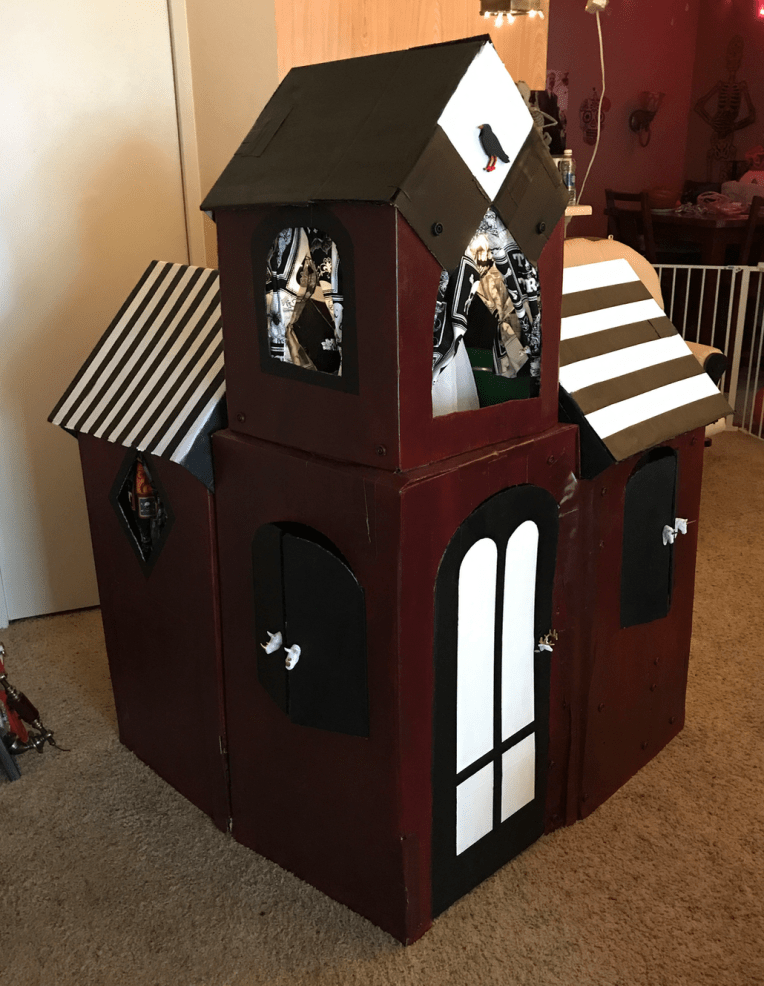
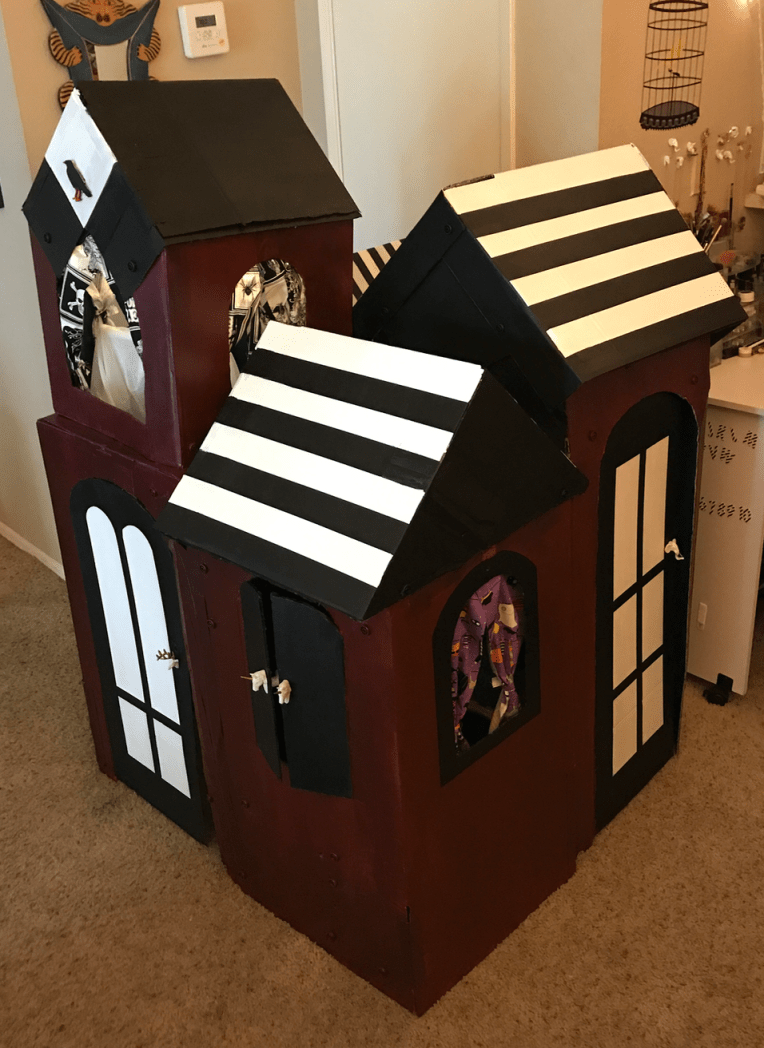
Once I had cut out all the windows and doors, I then attached the boxes together. First I attached the base and then the roofs. As I mentioned previously, I originally intended the house to be only two boxes wide (as shown in the bottom pictures). Originally I was using shipping tape, but soon decided that wouldn’t hold up over time.


After seeing how small and impractical it would be for a growing toddler, I decided I needed to add an additional two boxes to the width. So I purchased more boxes and cut out the doors and windows for those new boxes (the total boxes used, is listed above). I composed the roofs and attached everything with duct tape and Makedo Cardboard Construction Scru’s (I highly recommend those screws, they are magic). I also taped on Natural bamboo stakes to the inside of the boxes (height-wise) to make the house sturdier.
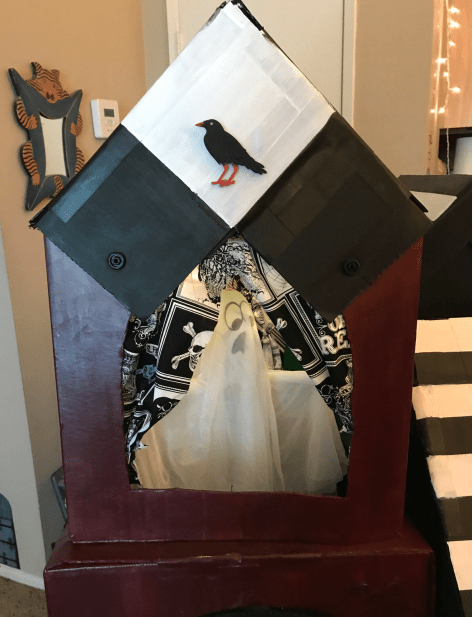
I added a smaller box to one of the main base boxes, then a roof on top of that smaller box (as shown in the image on the left). I wanted the highest part to have big open windows so that I could add lights on the inside and have it be a central feature.
At this point, I decided that I needed to make the ceilings higher, so I cut out the top parts of the boxes so that the roofs would be the tallest part of the house. Each of the four sections is different in height, because the house has different heights at each of the four corners (which was done intentionally to give it more shape and dimension).
I also wanted to add a secret escape route (it’s very similar to a doggy door). My son loves crawling in and out through that escape route. The escape door is shown in the picture on the right (it’s right below the diamond-shaped window).
I also decided I wanted to add a little art desk on the inside, but I wanted it to fold away so that my son could have more space when he wasn’t using his art desk. To make the art desk, I simply cut a piece of cardboard. It was about 12 inches by 12 inches. I folded it on one side by about 2 inches (leaving the desk to be 10 inches by 12 inches), so I could attach those 2 inches of the cardboard to the house and have the desk be able to fold away.
To make the desk sturdier, I taped a plastic cutting board to the bottom part so that the cardboard wouldn’t bend down. I also added a little shipping cardboard box below the desk, and covered it in duct tape, so that it would keep it in place when unfolded and so he could store his coloring books and crayons in there. Below is a picture of my son, sitting at his desk. This was before I removed that center piece of the house (the piece of cardboard behind him) to give him more room to move around in the house. The long strips of duct tape have the bamboo sticks underneath.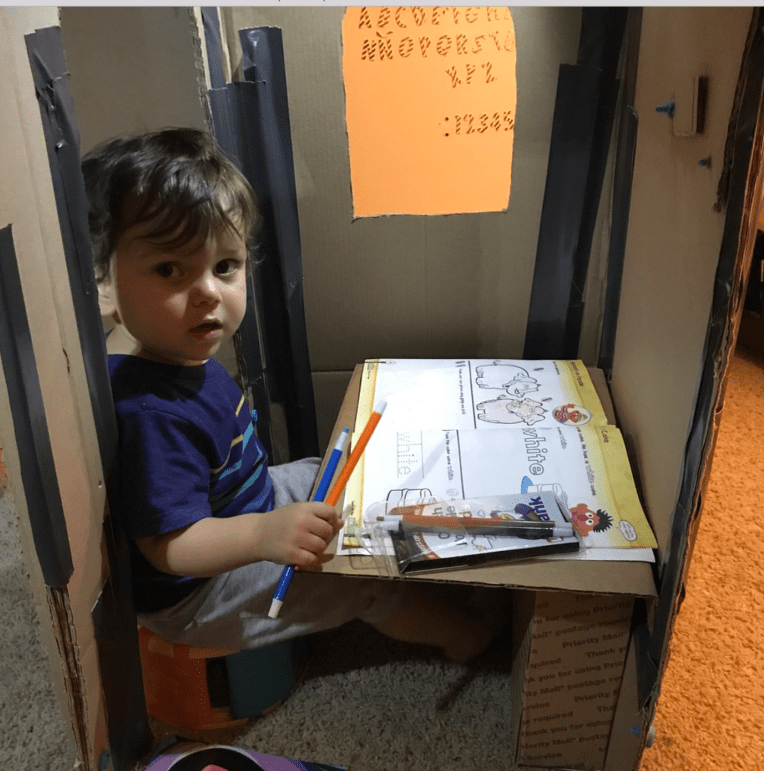
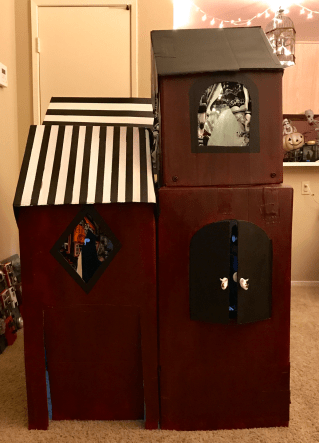
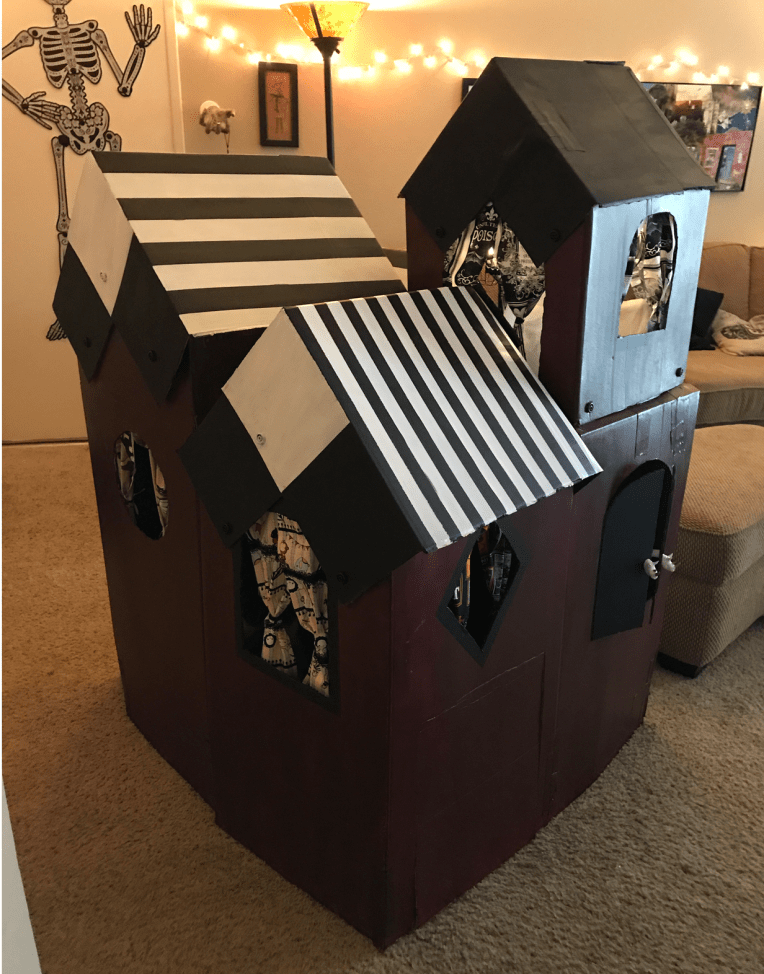
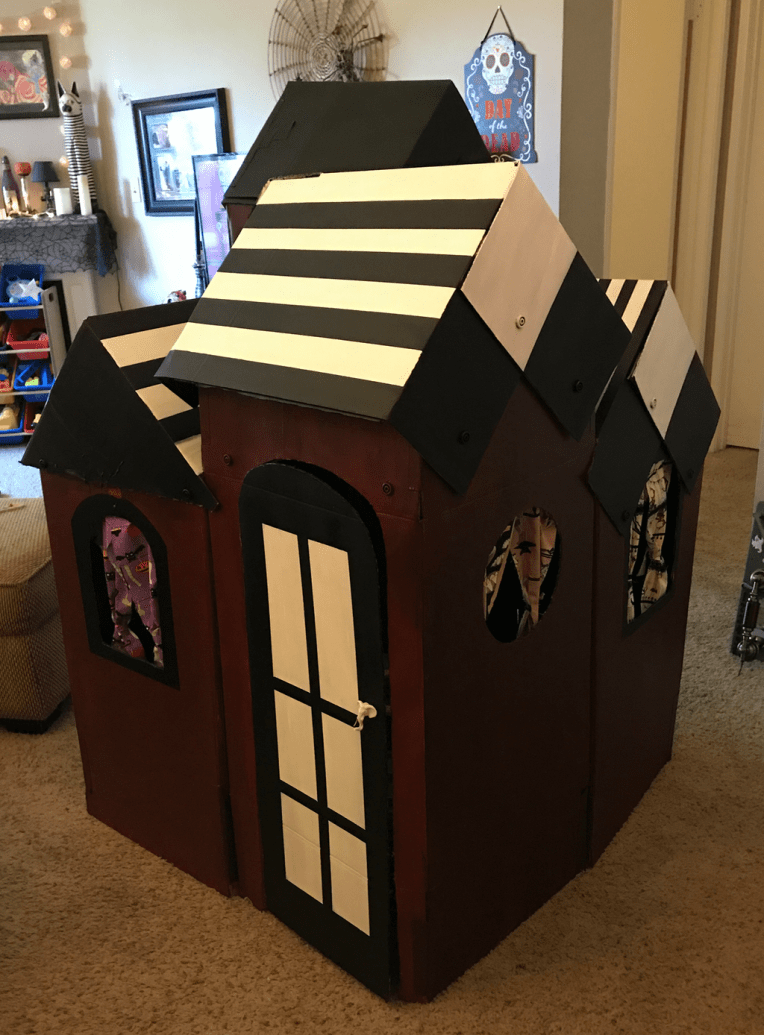
Once I had the base of the house down, I proceeded to paint. I used cheap acrylic paint and did not try very hard to make the application look polished.
Final Details:
I also added doorknobs to the doors and windows. I attached the doorknobs with super sticky mounting tape (usually used to hang picture frames).
I also cut the bamboo sticks in half and then quickly cut up some Halloween fabric I had lying around, and I wrapped it around the bamboo stick (I could have sown it, but instead I decided to put a safety pin to attach them, which made the process really fast). I then taped the bamboo sticks over the windows and tied a piece of string to the curtains to have them stay open.


The great thing about the Halloween theme is that it could have some rough edges, and it doesn’t matter. It actually helps it look creepier.
I added some fairy lights and some pumpkin halloween lights to the top roof part that has a lot of open windows and I also added a fabric ghost, which i found last minute and was perfect for this project. The crow at the front is an (originally) unpainted wooden crow I bought at Joann’s last year. I just painted it and then used double sided tape to attach it to the house.
The interior is definitely not as polished as the outside, but that’s okay. I can always touch it up with more paint or carve out the inside box pieces a bit more to make the edges smoother, if I wanted to do so. But honestly, I doubt that will be the case. I like it in it’s current state.
Below you can see the desk after it’s been painted (stored away, then out for him to use). To keep it folded, I used a super simple method, I simply taped a hair tie to the actual desk table and used one of the screws to tie the hair tie around it. I did not screw in that screw completely and I also left it unpainted so he could easily see it.
The remote over the desk is for the fairy lights (they are battery operated). And the little coffin next to the window is just a little box where he can add little keepsakes. I painted that and added little Halloween foam stickers.


Once I finished the house, I decided to add a little box next to the desk for easy access to his crayons (they would get all scattered in the box below the desk and get lost between his coloring books). I also added a little shelf over that window to put a little monkey lamp over that. And finally, I added a Victorian looking mirror I bought at target for $3 to one of the doors.


I ended up spending about 3 weekends working on the project. It did not take too long and my son absolutely loves it. He has his legos, coloring books, and dolls in there and he goes in there to play all the time. I love hearing and seeing him in there. And I think as he grows a bit older and starts wanting more alone time, he will use it even more.


I highly recommend anyone interested in making a cardboard house, to make one. You don’t have to paint it, add curtains, or door knobs. Your kids will appreciate even a large box they can crawl into. If you do decide to make one, please share. What was your theme? What creative additions did you add to make it unique?
Make sure you check back and follow me on Instagram (@WhimsicalStoryBooks) to get sneak peeks, updates, and opportunities to win some of my art.
