
A Bit of Background Info

I fell into paper art unexpectedly. I was participating in an Instagram Challenge in 2017, called Drawlloween. I felt like something was missing from my art pieces, so I decided to cut out my illustrations and assemble them like a little diorama.

After that, I was hooked – especially when I began adding lights.
Eventually my art evolved from lightboxes to more polished looking illustrations. It took a lot of practice and experimentation to get my work to look more professional, but that’s part of what I love – learning and evolving.


Below are the techniques that have helped me yield the best results. I’m sure they’ll change. But as of mid 2021, this is how I create my cut paper art illustrations. And even though the number of steps might seem daunting, the more I create, the faster each step becomes.
Step One – Come up with an idea
My ideas for illustrations come from all sorts of places. Sometimes I choose to draw an illustration from one of my picture book manuscripts. Other times I choose ideas that I think are interesting. Or I create something based on an art challenge I’m taking part in. While other times, I try to come up with pieces that will help make my portfolio a bit more diversified – in terms of types of characters, angles, types of scenes, themes, etc. I just make sure that the theme and the story, are exciting to me.
Step Two – Sketch my idea
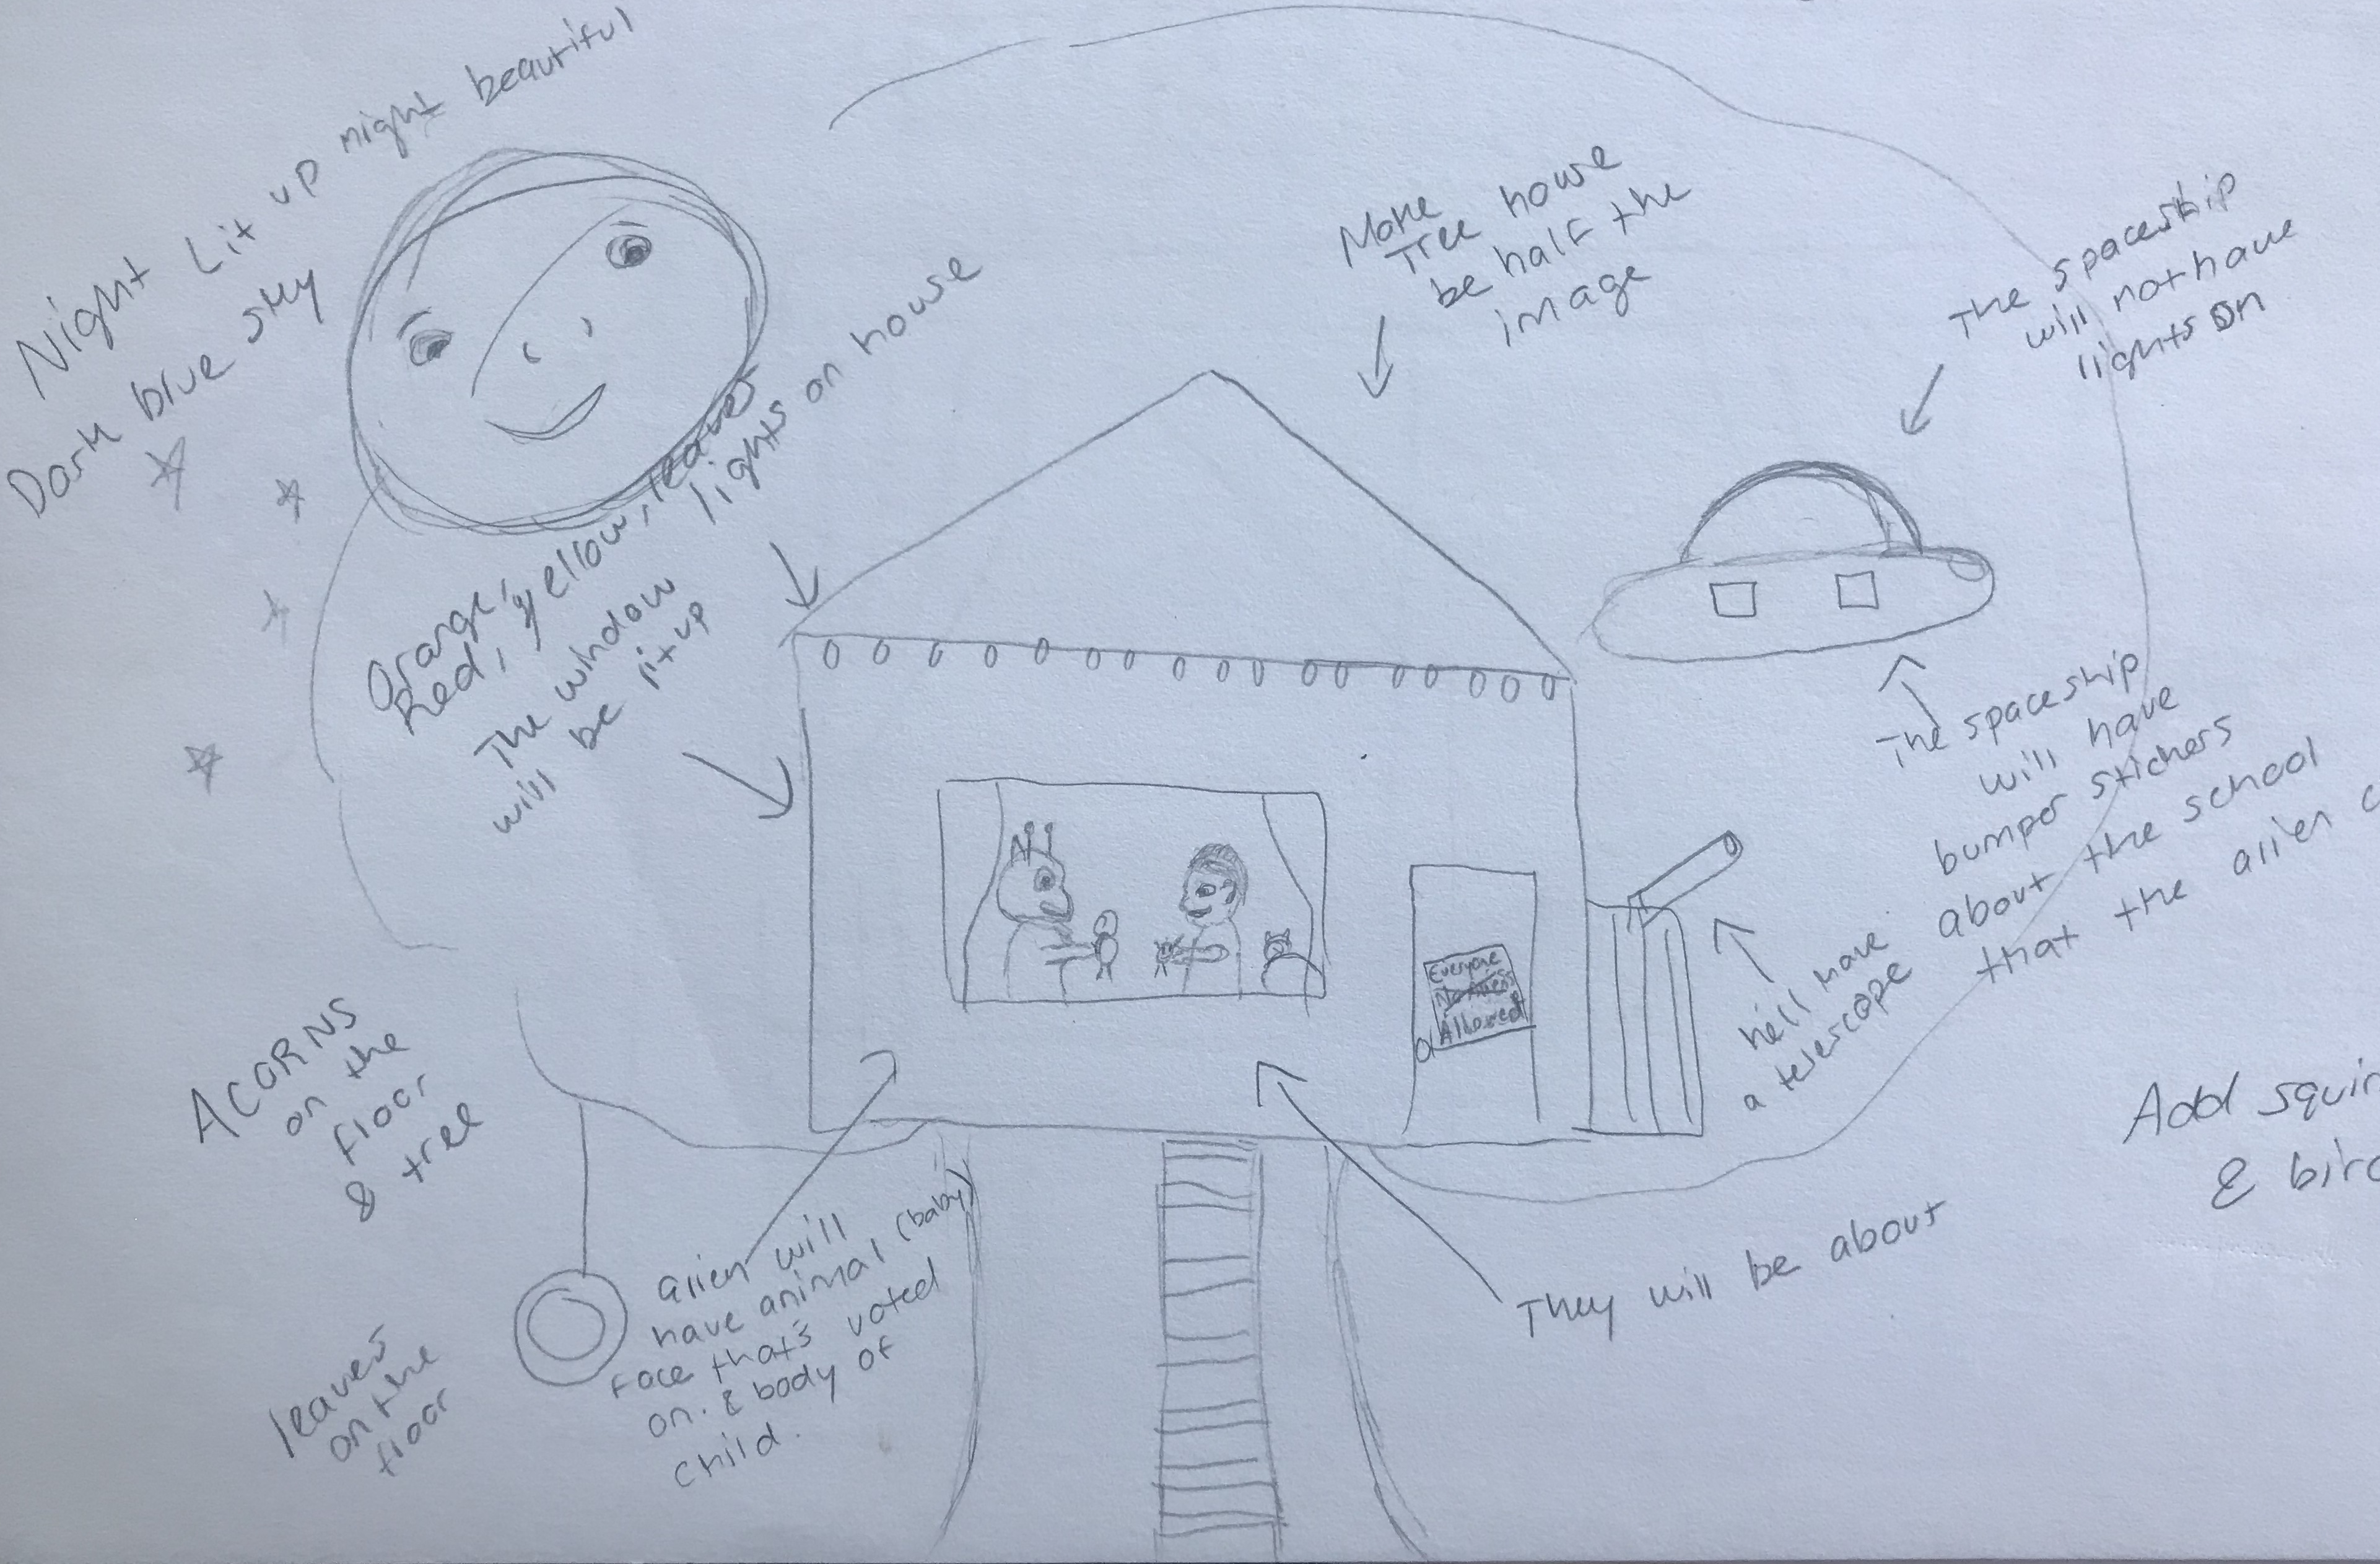
Once I’ve come up with the idea, I start sketching – the sketches are VERY rough. I usually know right away how I want the overall illustration to look – so I make sure to get it down on paper. I sometimes add little notes on where I want to add light or where I want to add extra little details. I also make notes if I want to use vellum or felt instead of colored cardstock paper.
Step Three – Look for references
I look online for references for the different elements I will be including in my illustrations. I also ask people I know, to model for me in different poses (usually it’s my husband or kids). The pictures or videos I take of them, function as reference material. And a lot of times, I’ll create private Pinterest boards with the references I found.
Step Four – Begin drawing illustration
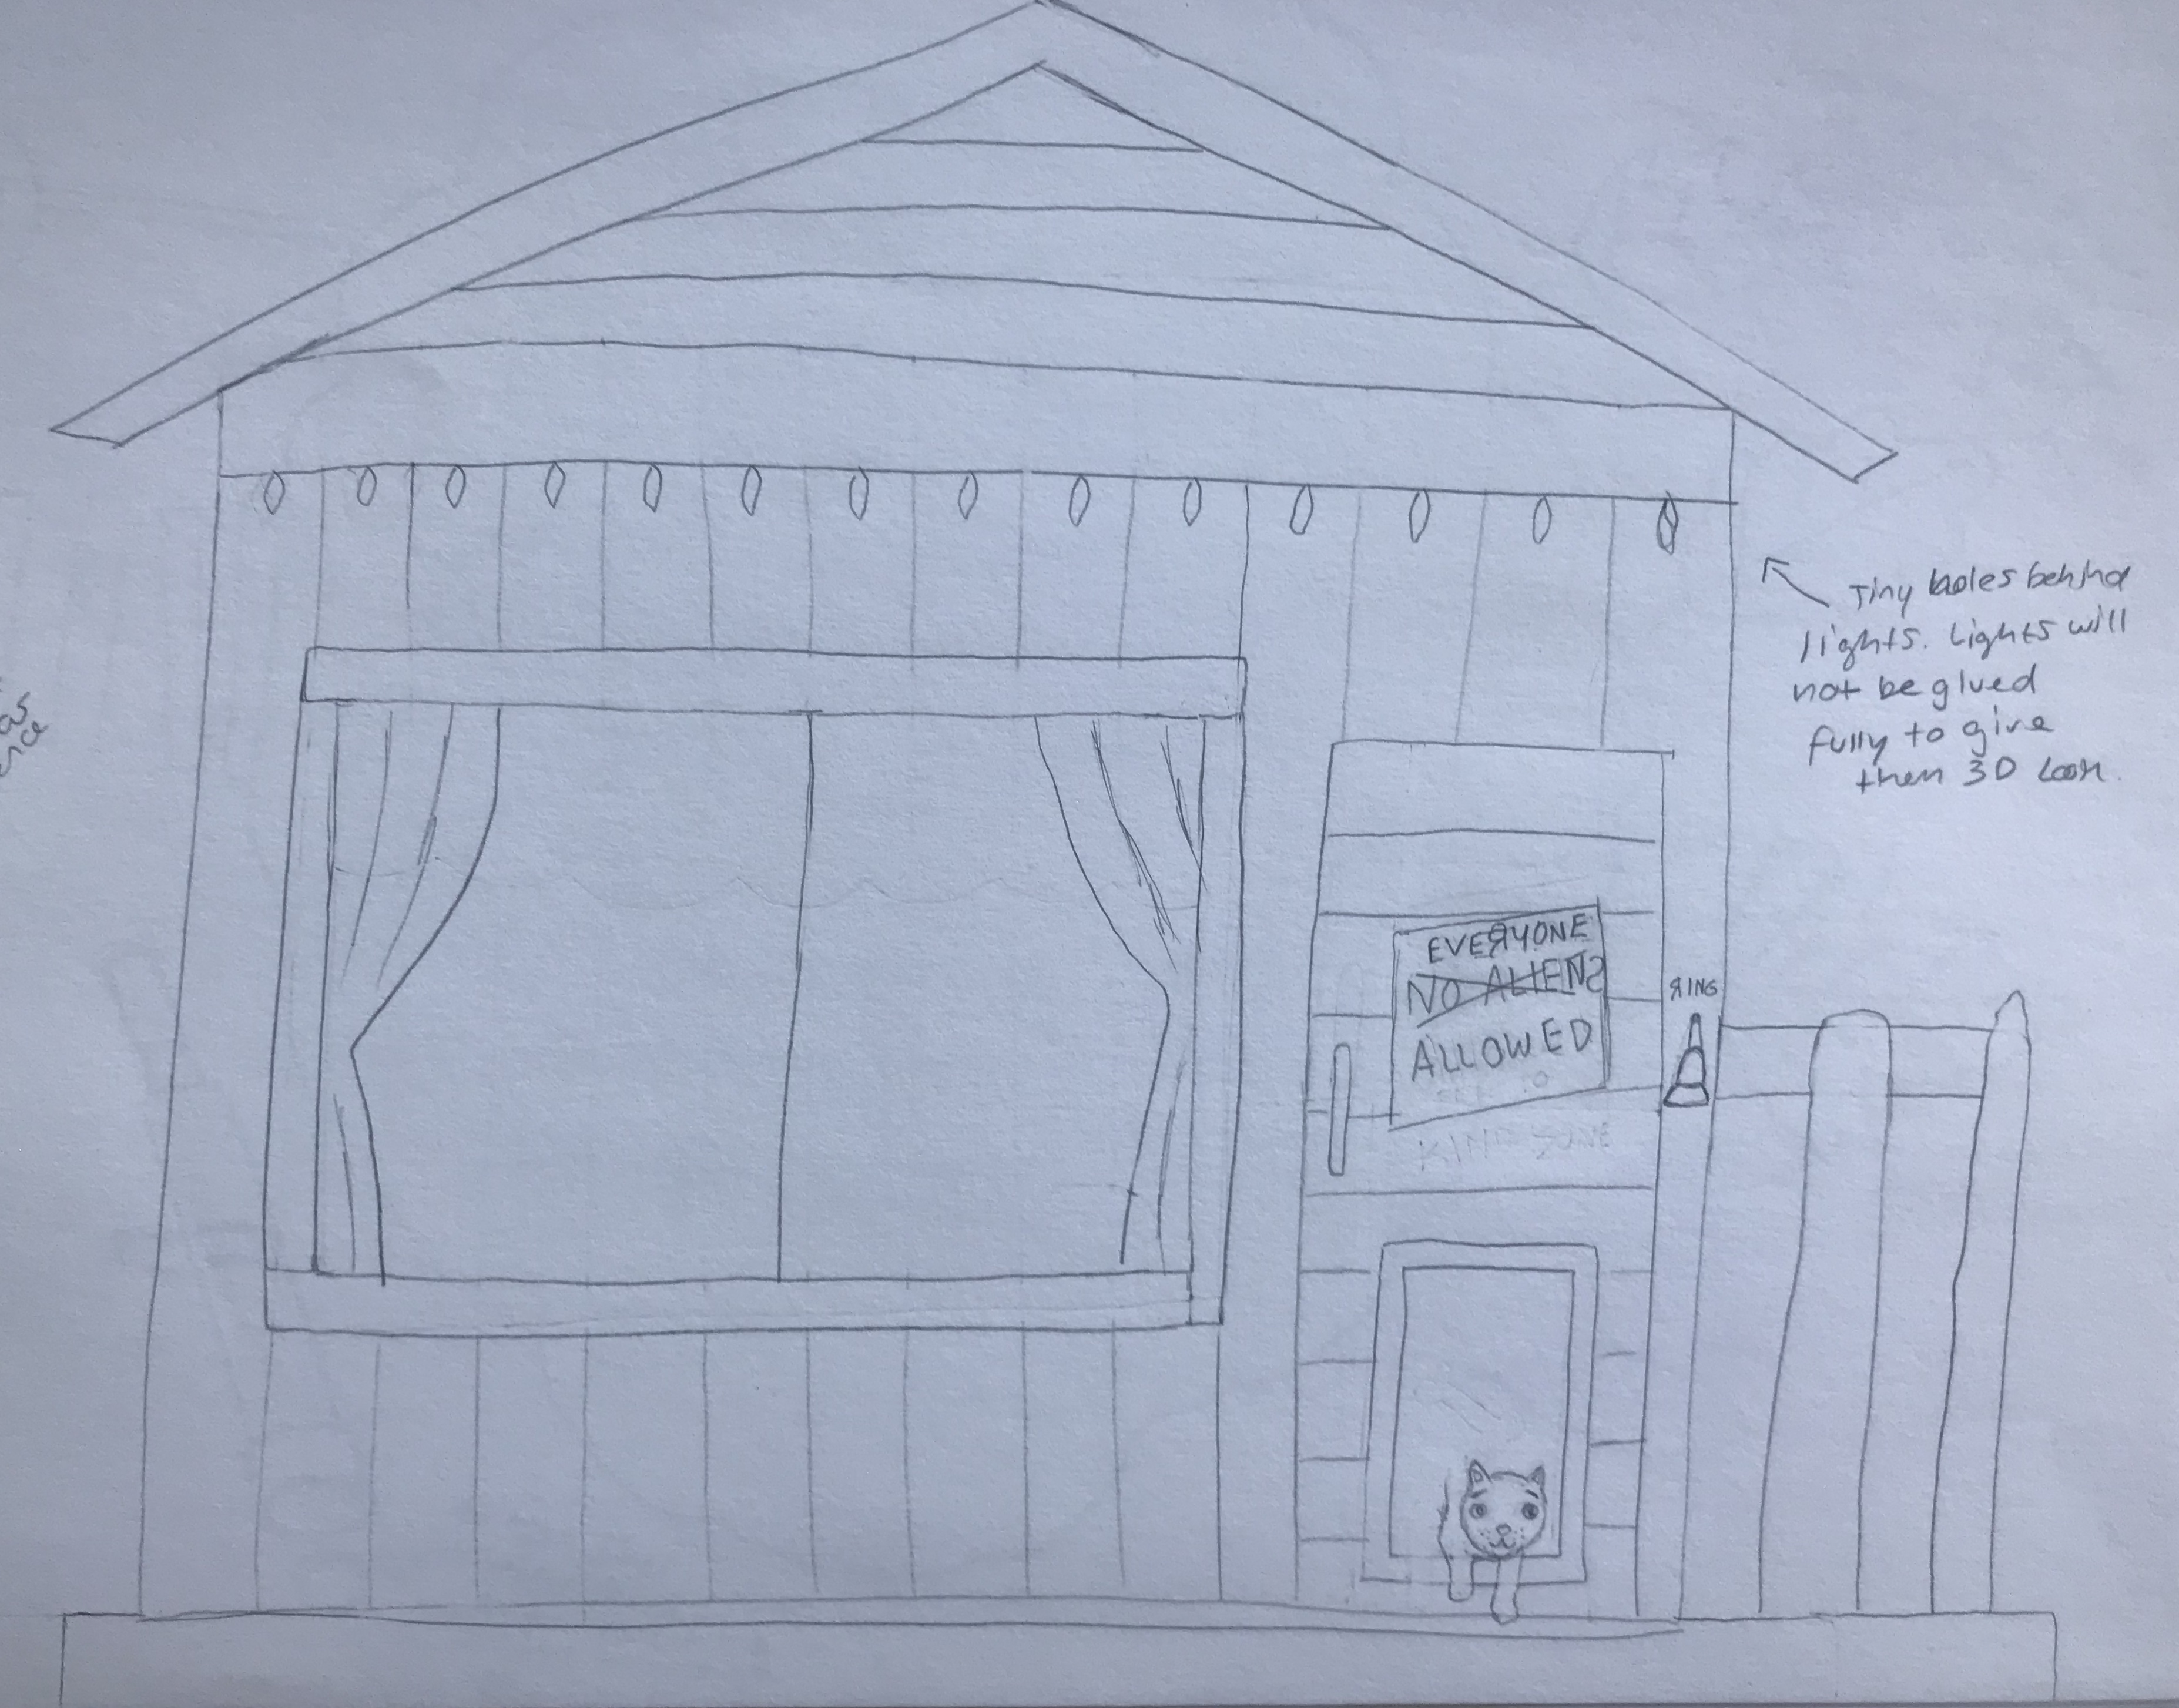
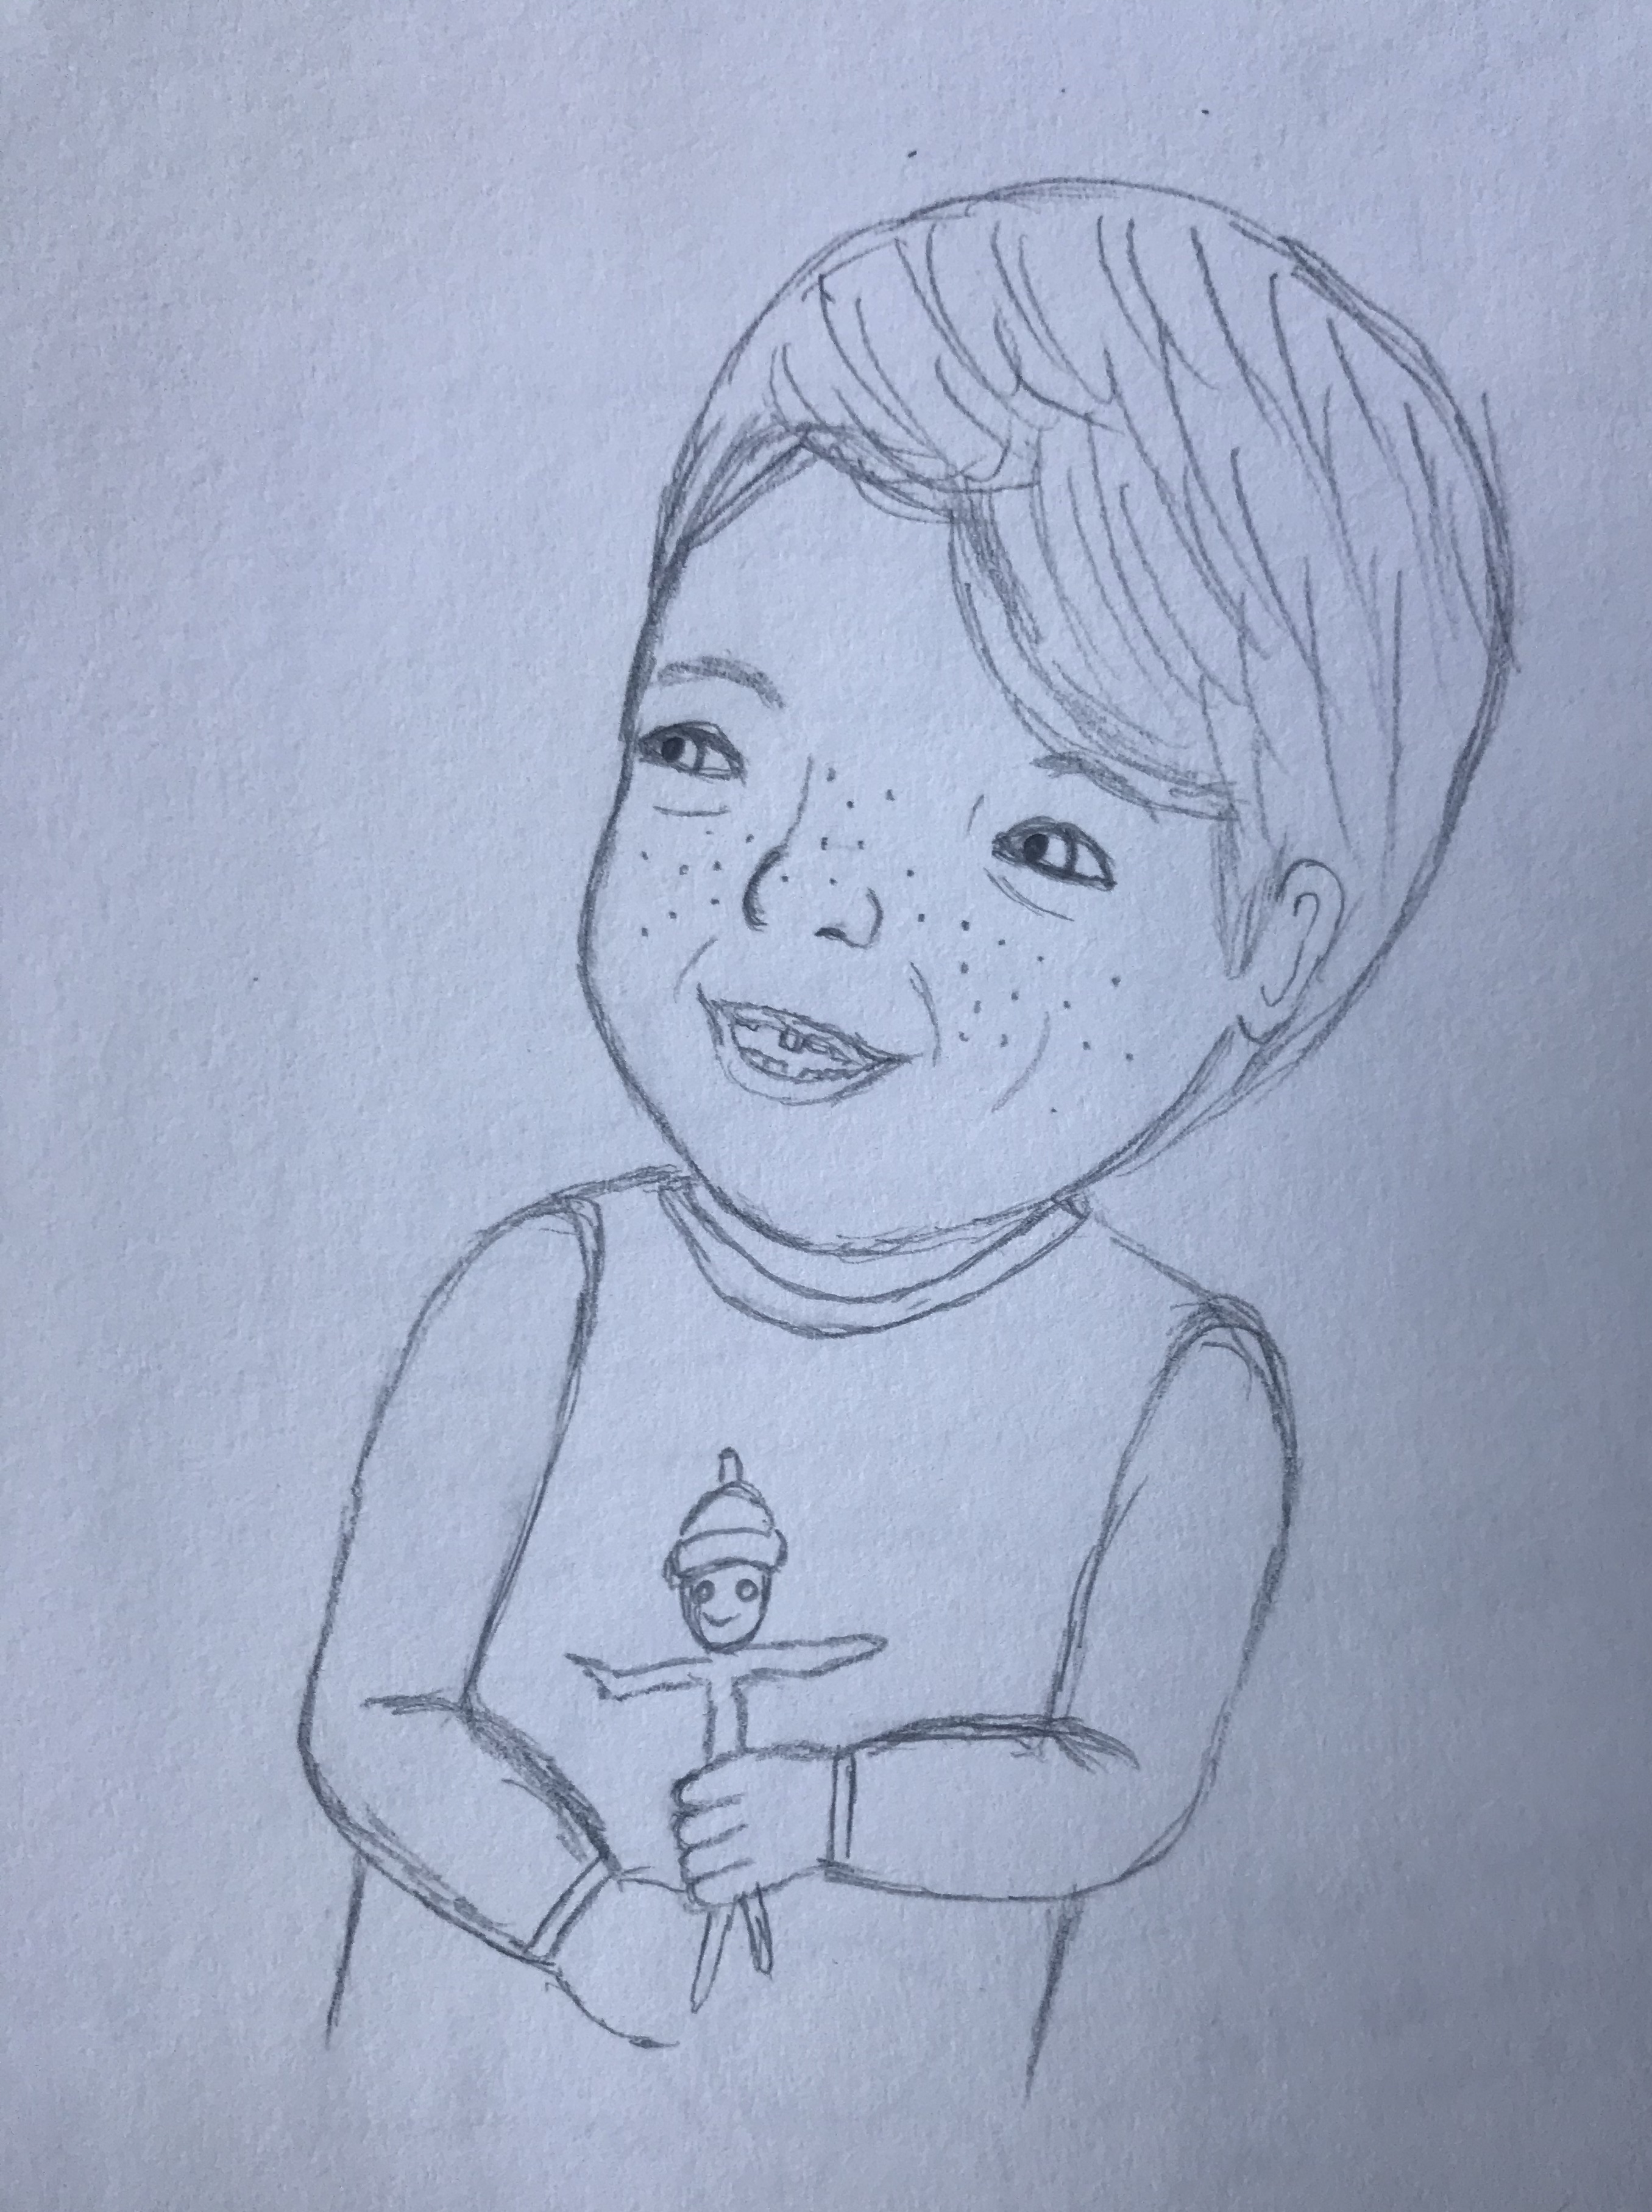
I then decide what I want the look to be. If I’m drawing a house, for example, I combine different elements from different references I find and make something new. I then draw them out on my iPad on Procreate (these were created on a sketchbook – they were made before I discovered how amazing an iPad could be).
My pictures are always a little lopsided, but I feel like they reflect the imperfectness of life.
Step Five – Decide on Composition

Once I’ve finished my drawing, I arrange the pieces together like a puzzle. It’s always fun to see this step of the creation process – it gives me a better idea of how the final illustration will look. A lot of times, I also rearrange things to figure out the best composition.
Step Six – Choose my color scheme
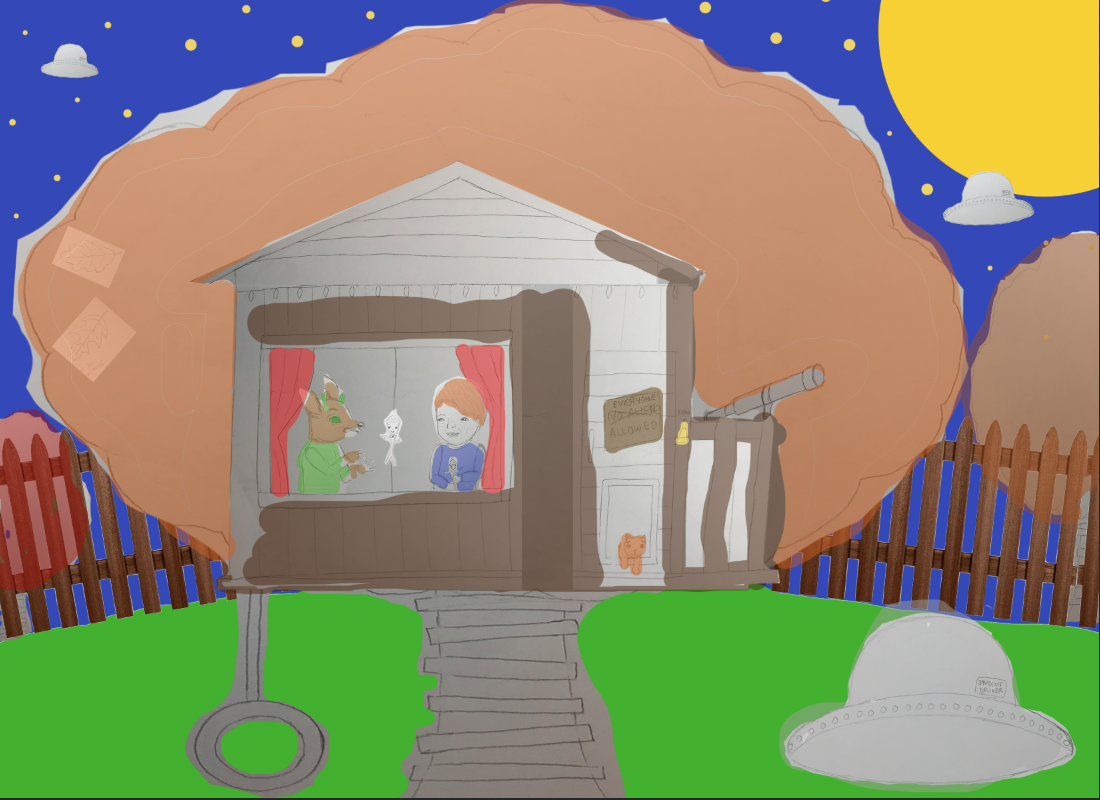
I then decide on a color scheme. I add a layer of color in Photoshop – I reduce the opacity by about 50%, so I can see the details of the illustrations behind the color. At this point, the illustration does not look great, but I get a better idea if the colors are working together or not.
Step Seven – Print out individual pieces in the size I want them on white cardstock paper, then cut them out
Once I know how I want the final illustration to look, I separate the different elements and print them out on white cardstock paper. Then, I cut them out. I use scissors or my excel blade, if they are small and have little details. Yes, it’s a long and tedious process, but the hard work pays off in the end.
Step Eight – Transfer designs to colored cardstock paper, vellum paper, or felt and begin cutting layers
I then use the print outs as a tracing reference. I trace them onto colored cardstock paper, vellum, or felt. As I go, I also cut different layers, like the clothing, the arms, the legs, or the head.
Step Nine – Begin gluing layers together and add details with colored pencils
Once I’ve cut all my layers, I then glue them together. I sometimes add foam board in between pieces of cardstock, to give my pieces a more 3D look. I’ll add details (for example to the faces and hair of the characters) with Prismacolor Colored Pencils.
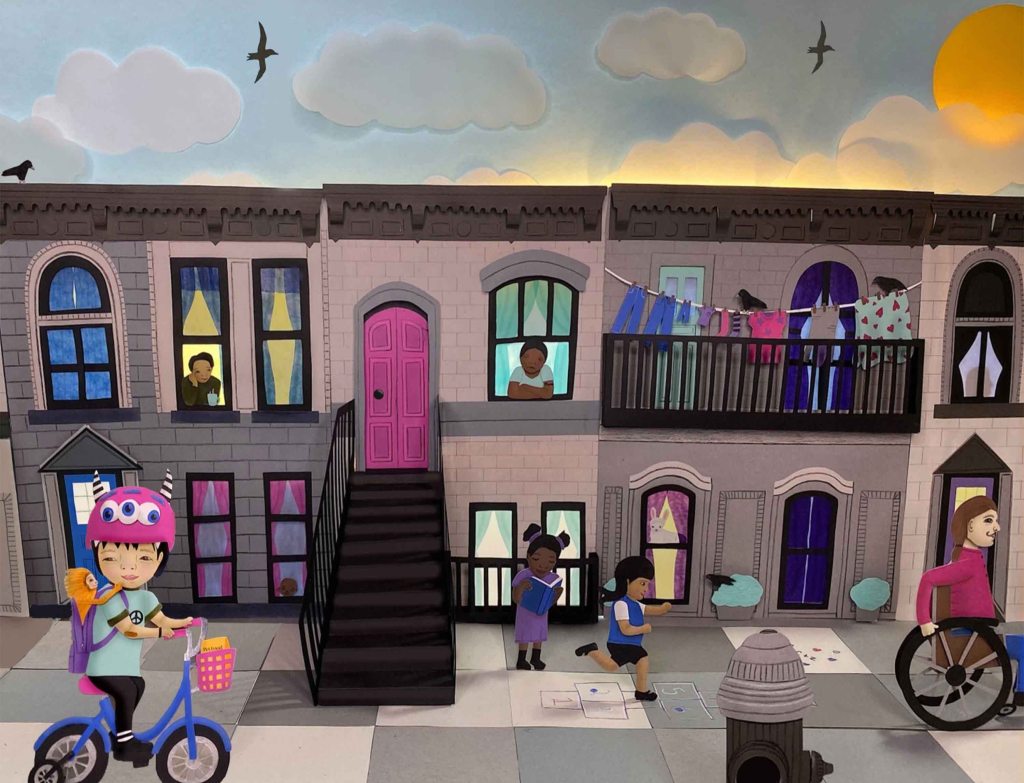
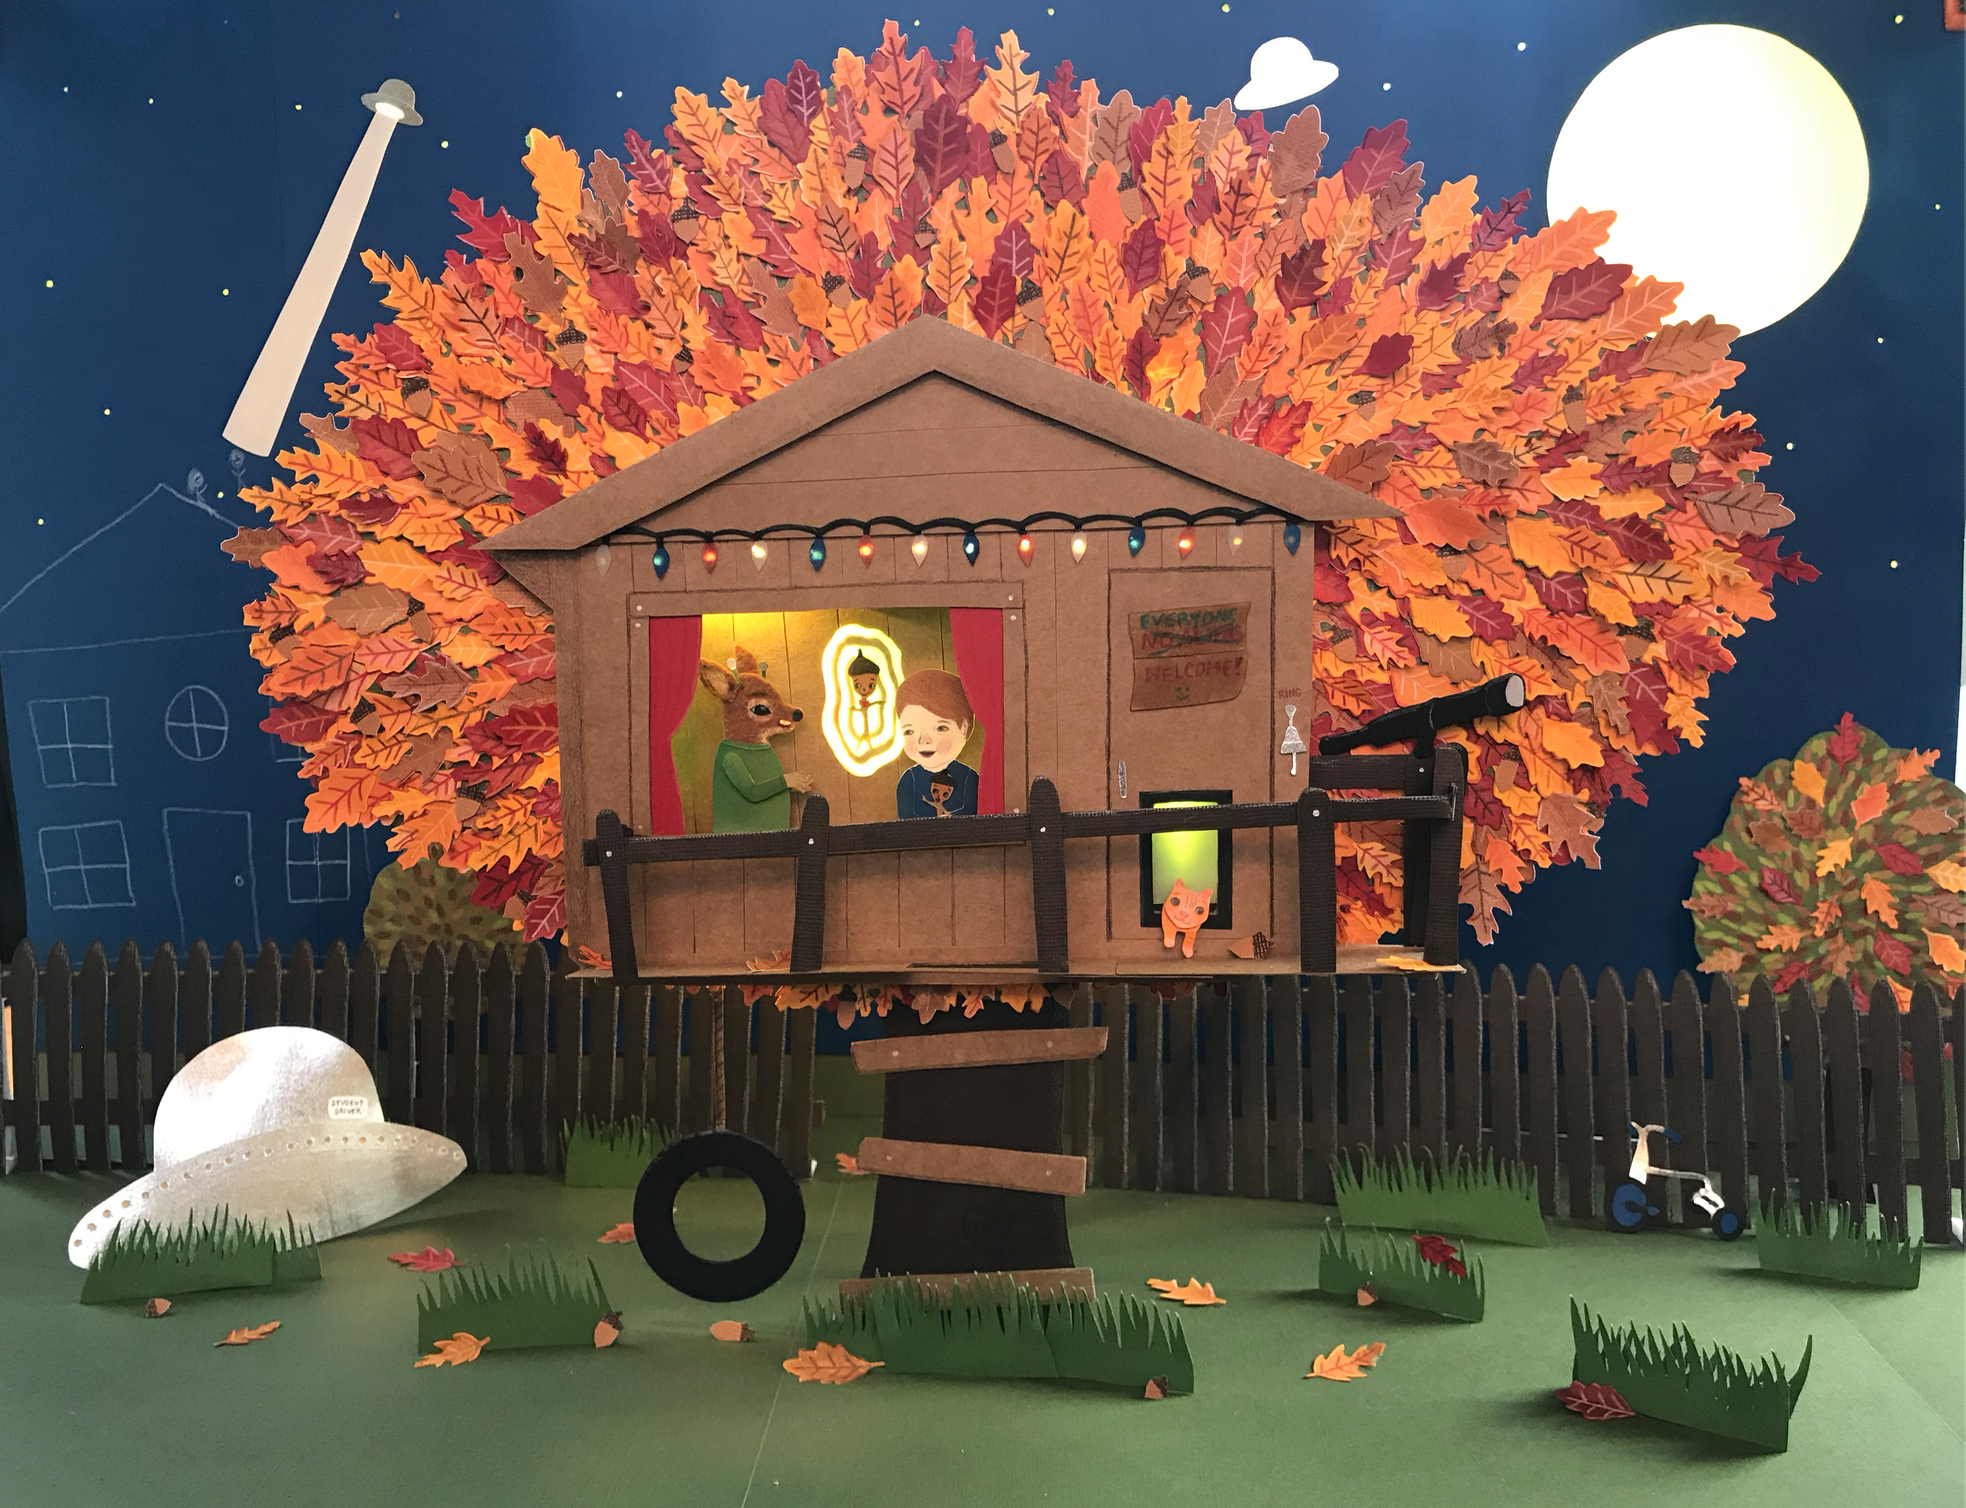
Step Ten – Put all the pieces together and add light
I then put everything together. This is one of the most exciting parts of the whole process. I make sure the composition is working, before I glue things down. I also add lights to a lot of my illustrations – I just love the way it looks. For my latest pieces, I’ve been using flexible LED light strips. These work great because I can bend the lights, however I wish, and I can also trim them so that they are as long or short as I need them to be.
Below you’ll see the “Everyone Welcome” piece with different lighting setups – before any photoshopping was done.


Step 11 – Photograph the scene, from different angles, and edit in Photoshop
The last step involves photographing my piece. To ensure I get the best image possible, I play with the lighting. I also try different angles. Once I’ve taken about 100 pictures, I then go through them and choose the best one and I photoshop it to make sure there aren’t any bits that look odd. And then I’m done!

~ ~ ~ ~ ~ ~ ~ ~ ~ ~ ~ ~ ~ ~ ~ ~ ~ ~ ~ ~ ~ ~ ~ ~ ~~~ ~ ~ ~ ~ ~ ~ ~ ~ ~
Make sure you check back and follow me on Instagram (@CynthiaGDeLaTorre) to get sneak peeks, updates, and opportunities to win some of my art.
