The path to publishing is so different for everyone. You never know how you will reach those important milestones because, we all have a different story.
My Instagram Announcement After Signing with my Agent
When I first made the decision that I wanted to seriously pursue a career in children’s books, everything seemed so daunting. I had no clue how people reached out to publishing houses, why agents were so important, what a query letter was, or even how difficult it was to write a polished manuscript that would be worthy of being published, or how to create illustrations with a consistent style. I was clueless.
I’m always fascinated by how artists work and how they are able to make their creations. So, I wanted to share my process. Especially because, when I first discovered paper art, a little over 2.5 years ago, I found it hard to figure out how paper artists made their amazing 3D creations. I couldn’t find any type of tutorials or information on their process. If you are interested in making cut paper art, I hope my blog gives you a bit of a starting point.
A Bit of Background Info
2017 Drawlloween Piece
I fell into paper art unexpectedly. I was participating in an Instagram Challenge in 2017, called Drawlloween. I felt like something was missing from my art pieces, so I decided to cut out my illustrations and assemble them like a little diorama.
2018 Lightbox
After that, I was hooked – especially when I began adding lights. Eventually my art evolved from lightboxes to more polished looking illustrations. It took a lot of practice and experimentation to get my work to look more professional, but that’s part of what I love – learning and evolving.
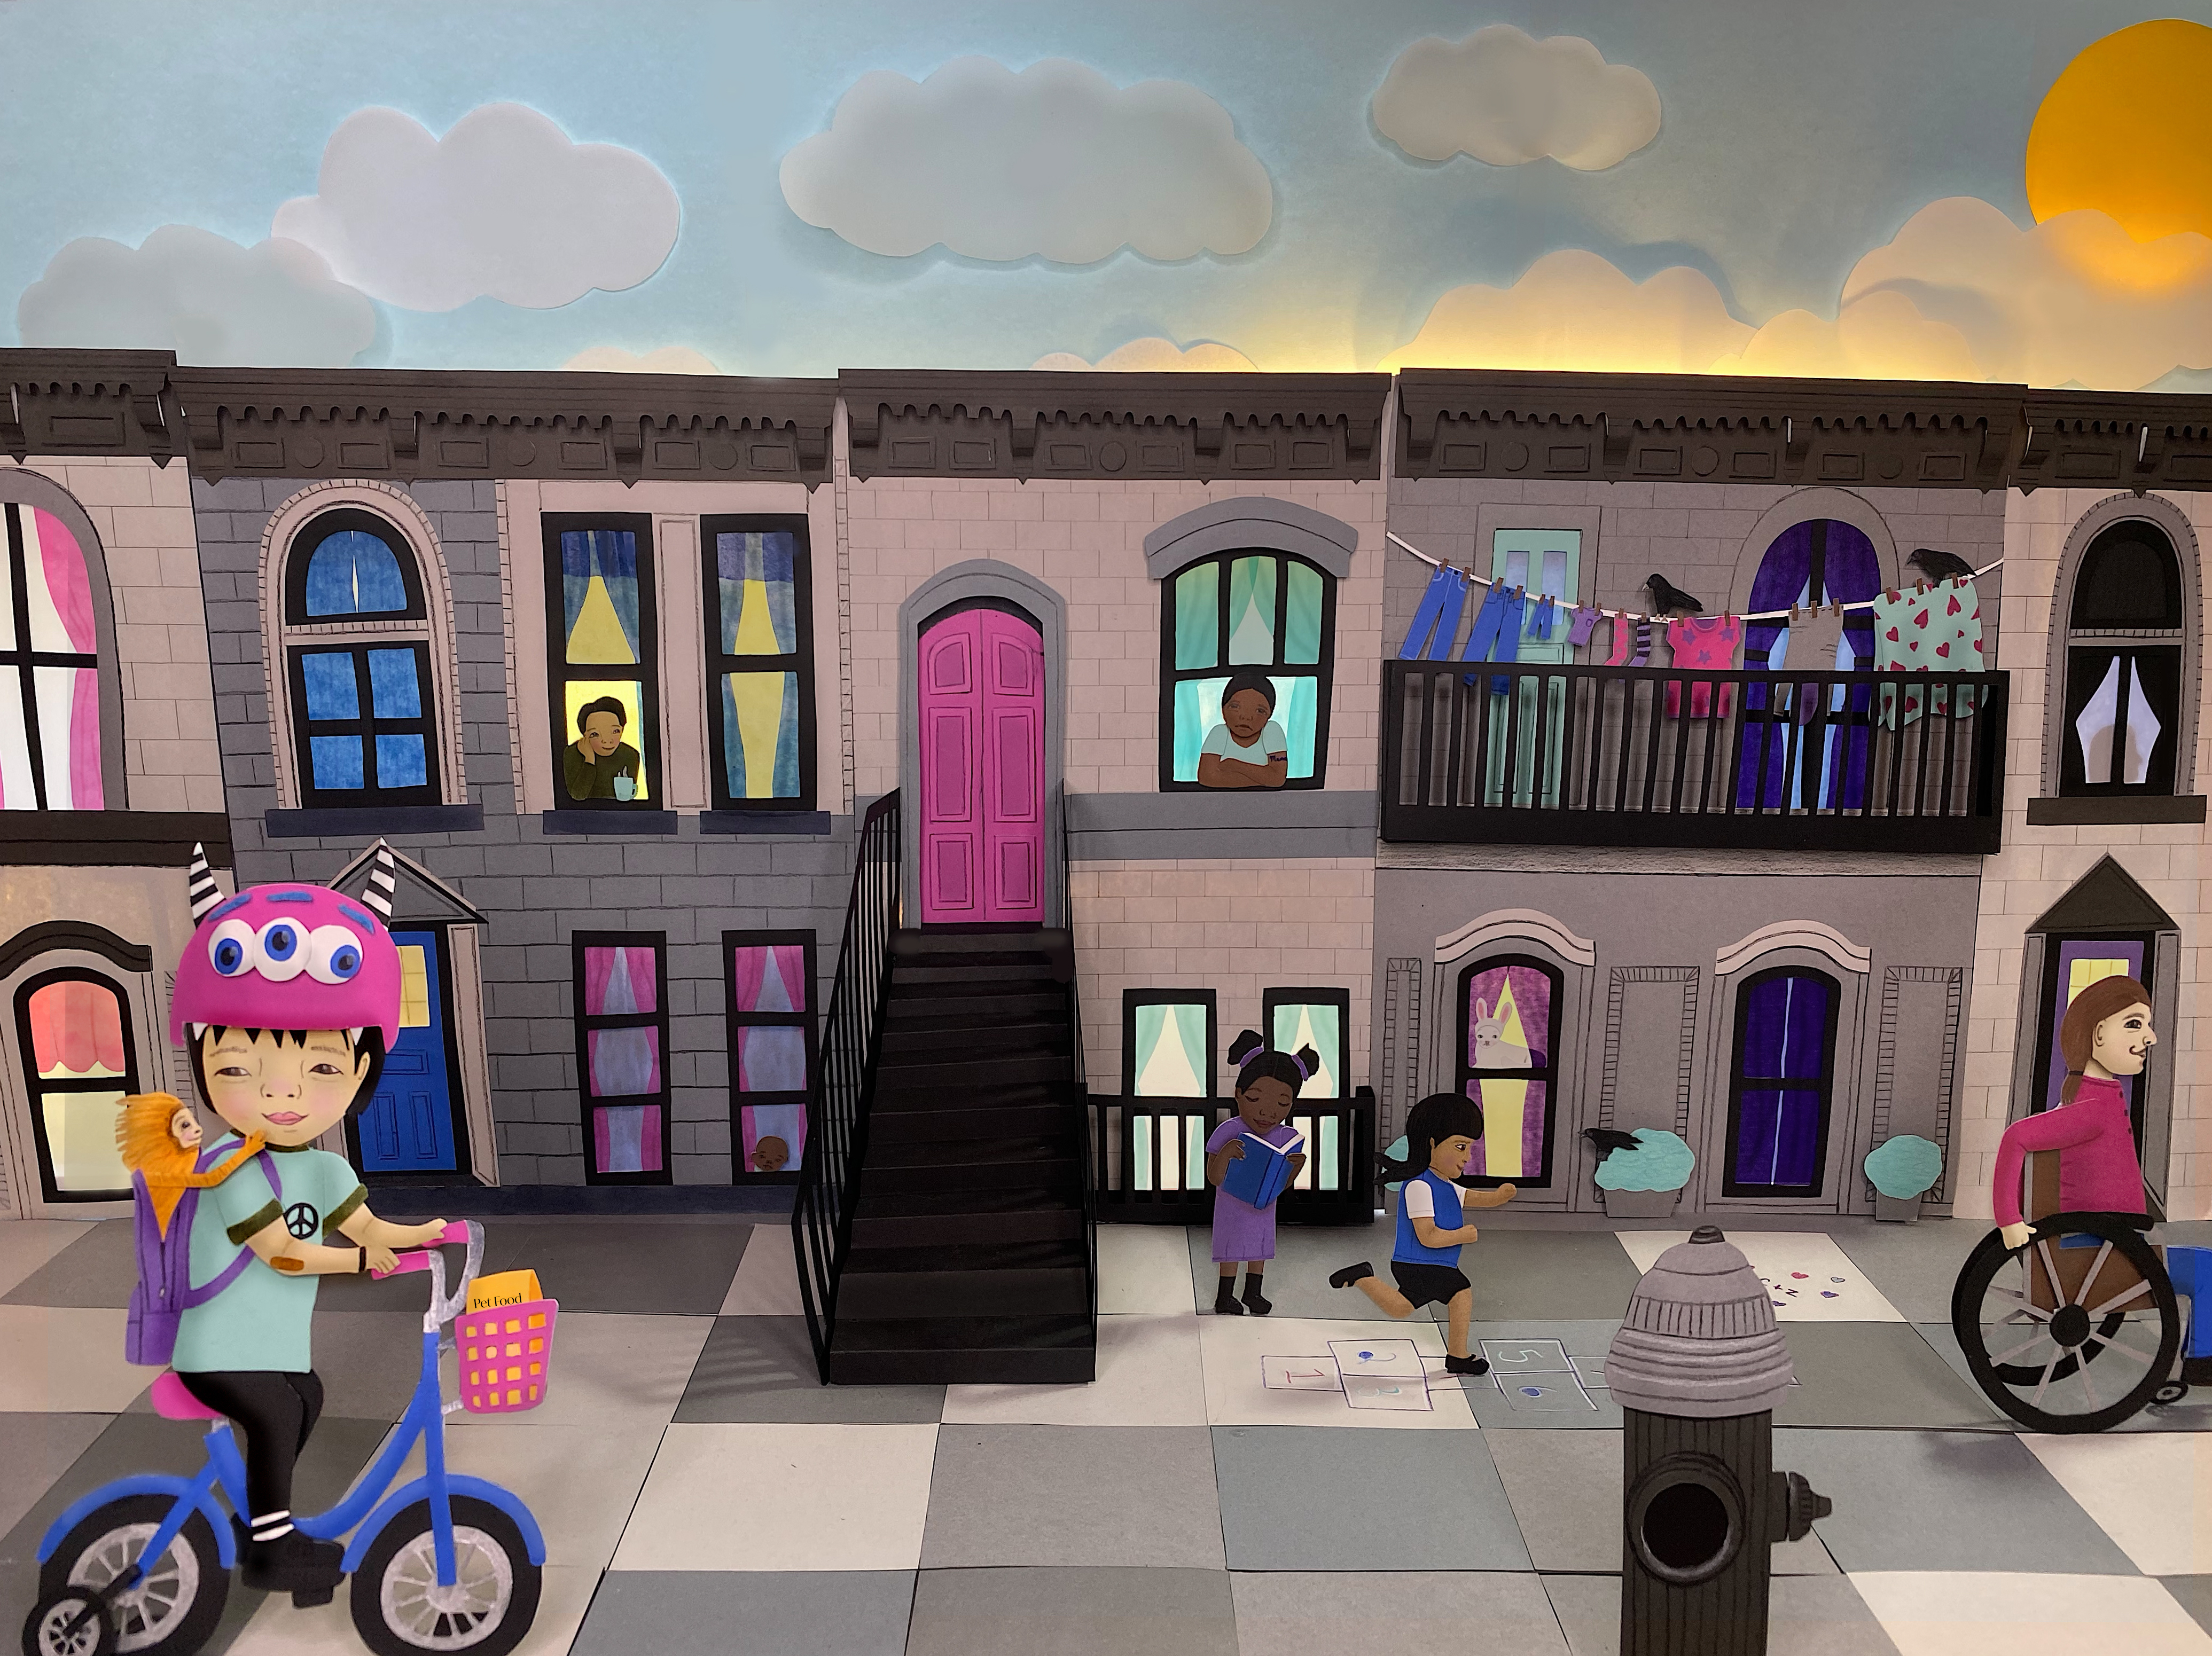
2019 Illustration
2020 Illustration
Below are the techniques that have helped me yield the best results. I’m sure they’ll change. But as of mid 2020, this is how I create my cut paper art illustrations. And even though the number of steps might seem daunting, the more I create, the faster each step becomes.